
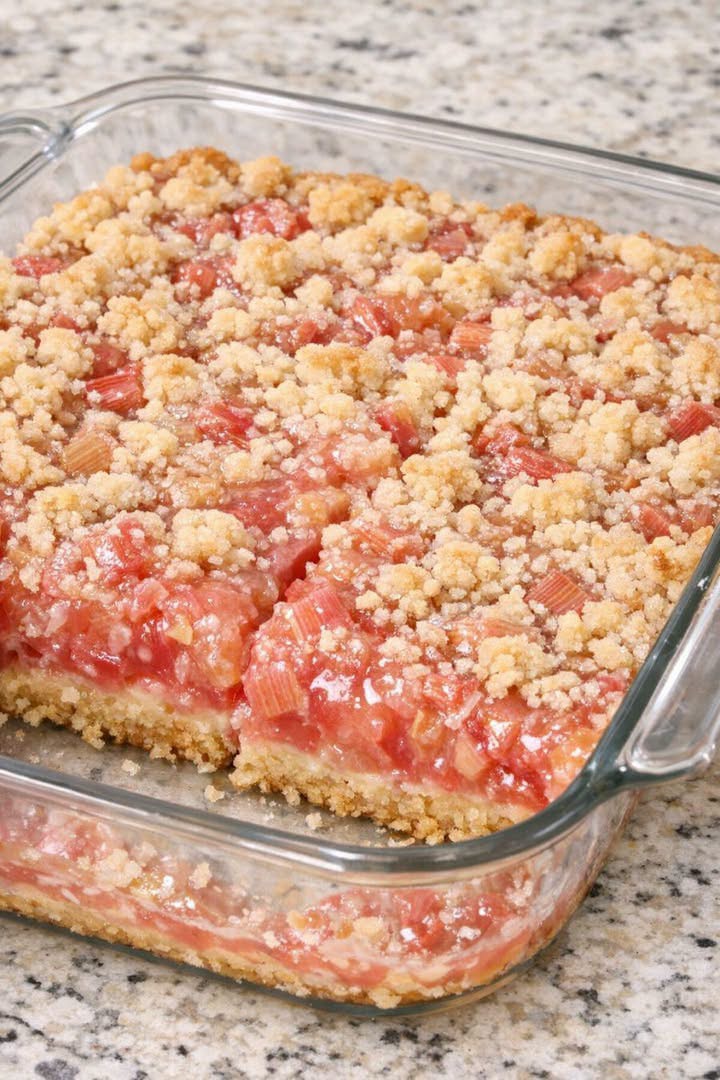
4-Ingredient Rhubarb Dream Bars are a delightful old-fashioned dessert that combines the bright, tangy flavor of rhubarb with a buttery crust and a sweet, tender filling. These simple bars are perfect for spring and summer baking, potlucks, family gatherings, or whenever you have fresh rhubarb to use.
With just four basic ingredients, this recipe keeps preparation easy while delivering a wonderful balance of sweet and tart flavors. The rhubarb softens as it bakes, creating a deliciously fruity center that pairs beautifully with the rich, golden crust.
If you love vintage-style desserts that use simple ingredients and taste like homemade comfort, these rhubarb bars deserve a place in your recipe collection.
Why You’ll Love These Rhubarb Dream Bars
- Only four ingredients: A short ingredient list makes this recipe easy to prepare.
- Sweet and tangy: Rhubarb gives the bars a bright flavor that balances the sweetness.
- Perfect for sharing: Cut them into squares for picnics, potlucks, and afternoon treats.
- Easy preparation: No complicated pastry techniques or special equipment are required.
- Make-ahead friendly: The bars can be chilled and sliced before serving.
Ingredients
- 2 cups chopped rhubarb: Fresh rhubarb works especially well, but thawed frozen rhubarb can also be used after draining excess liquid.
- 1 cup all-purpose flour: Forms the base of the buttery crust.
- ½ cup unsalted butter, softened: Adds richness and helps create a tender, crumbly base.
- ¾ cup granulated sugar: Sweetens the rhubarb and helps the filling set.
These four ingredients create a simple, rustic dessert. Because rhubarb varies in tartness, you can adjust the sugar slightly to suit your taste, although doing so changes the original four-ingredient proportions.
How to Make 4-Ingredient Rhubarb Dream Bars
Step 1: Prepare the Oven and Pan
Preheat your oven to 350°F (175°C). Lightly grease an 8-inch square baking pan or line it with parchment paper, leaving a little overhang to make the bars easier to remove.
Step 2: Make the Crust
In a medium bowl, combine the flour and softened butter. Mix with a fork or your fingertips until the mixture resembles coarse crumbs and begins to hold together when pressed.
Press the mixture firmly and evenly into the bottom of the prepared pan.
Step 3: Prepare the Rhubarb Filling
Place the chopped rhubarb in a bowl and toss it with the granulated sugar. Spread the mixture evenly over the crust.
Try to distribute the rhubarb across the entire surface so each bar has a good balance of fruit and crust.
Step 4: Bake Until Set
Bake for approximately 35–45 minutes, or until the edges are lightly golden and the rhubarb is tender. The filling should look softened and juicy rather than watery.
Ovens and rhubarb moisture levels vary, so begin checking around the 35-minute mark.
Step 5: Cool and Slice
Remove the pan from the oven and let the bars cool completely. For cleaner slices, refrigerate them for 1–2 hours after cooling.
Use a sharp knife to cut into squares and serve.
Tips for the Best Rhubarb Dream Bars
Cut the rhubarb evenly. Pieces about ½ inch long cook consistently and make the bars easier to slice.
Drain frozen rhubarb well. Thaw it first and remove excess liquid to help prevent a soggy crust.
Press the crust firmly. A compact, even base is less likely to crumble when the bars are cut.
Allow enough cooling time. The filling needs time to settle. Cutting while the bars are hot may cause them to fall apart.
Taste your rhubarb. Very tart rhubarb may need a little more sugar, while milder stalks may need less.
Easy Variations
The classic recipe uses four ingredients, but you can customize it if you do not mind adding extras.
- Strawberry-rhubarb bars: Replace part of the rhubarb with chopped strawberries.
- Vanilla rhubarb bars: Add a little vanilla extract to the fruit mixture.
- Crumble topping: Reserve a small portion of the flour-and-butter mixture and crumble it over the fruit before baking.
- Citrus flavor: Add a little lemon or orange zest for a fresh, bright note.
- Gluten-free version: Use a suitable measure-for-measure gluten-free flour blend, checking that the crust holds together.
Additional ingredients can affect the sweetness, moisture, and baking time, so check the bars for doneness as they bake.
What to Serve with Rhubarb Dream Bars
These bars are delicious on their own, but they also pair wonderfully with:
- A cup of coffee or tea
- A scoop of vanilla ice cream
- Fresh strawberries or raspberries
- A spoonful of lightly sweetened whipped cream
- A glass of cold milk
For a simple dessert, serve a chilled bar with vanilla ice cream and let the sweet creaminess balance the tart rhubarb.
Storage Instructions
Refrigerator: Once completely cool, store the bars in an airtight container in the refrigerator for up to 4 days.
Freezer: Wrap individual bars or separate layers with parchment paper, then place them in a freezer-safe container. Freeze for up to 2 months for best quality.
Thawing: Thaw frozen bars in the refrigerator overnight. They are delicious chilled or brought to room temperature before serving.
Frequently Asked Questions
Can I use frozen rhubarb?
Yes. Thaw the rhubarb completely and drain away excess liquid before combining it with the sugar. Extra moisture can make the crust soft.
Do I need to peel rhubarb?
Usually, no. Simply trim away the leaves and the tough ends, then wash and chop the stalks. Never eat rhubarb leaves, as they contain toxic compounds.
Why are my rhubarb bars too watery?
Rhubarb naturally releases liquid during baking. Frozen rhubarb that has not been drained, very large fruit pieces, or insufficient baking and cooling time can contribute to a loose filling. Drain thawed rhubarb well and allow the bars to cool completely before slicing.
Can I make these bars a day ahead?
Yes. Prepare and bake the bars the day before serving, cool them completely, and refrigerate in an airtight container. Chilling overnight often makes them easier to slice neatly.
How do I know when the bars are done?
The edges should be lightly golden, the rhubarb should be tender, and the filling should no longer look raw. The center will continue to settle as the bars cool.
Are these traditional Depression-era bars?
This recipe uses inexpensive pantry staples and seasonal rhubarb, making it consistent with economical home baking. However, this specific four-ingredient version should be described as an old-fashioned-inspired recipe rather than a historically verified recipe from the Depression era.
4-Ingredient Rhubarb Dream Bars Recipe Card
Prep Time: 15 minutes
Bake Time: 35–45 minutes
Cooling Time: 1–2 hours
Total Time: Approximately 2 hours 15 minutes to 3 hours
Servings: 9–12 bars
Oven Temperature: 350°F (175°C)
Ingredients
- 2 cups chopped rhubarb
- 1 cup all-purpose flour
- ½ cup unsalted butter, softened
- ¾ cup granulated sugar
Instructions
- Preheat the oven to 350°F (175°C). Grease or line an 8-inch square baking pan.
- Mix the flour and softened butter until crumbly.
- Press the mixture firmly into the bottom of the pan to form the crust.
- Toss the chopped rhubarb with the sugar.
- Spread the rhubarb mixture evenly over the crust.
- Bake for 35–45 minutes, until the edges are lightly golden and the rhubarb is tender.
- Cool completely, then chill if desired before cutting into bars.
Final Thoughts
4-Ingredient Rhubarb Dream Bars bring together everything wonderful about simple homemade baking: a buttery crust, tender fruit, and a sweet-tart flavor that feels both nostalgic and refreshing.
Whether you bake them for a family gathering, a weekend treat, or to make the most of seasonal rhubarb, these easy bars are a lovely addition to any dessert table. With only four ingredients and straightforward preparation, they prove that homemade desserts do not need to be complicated to be memorable.