
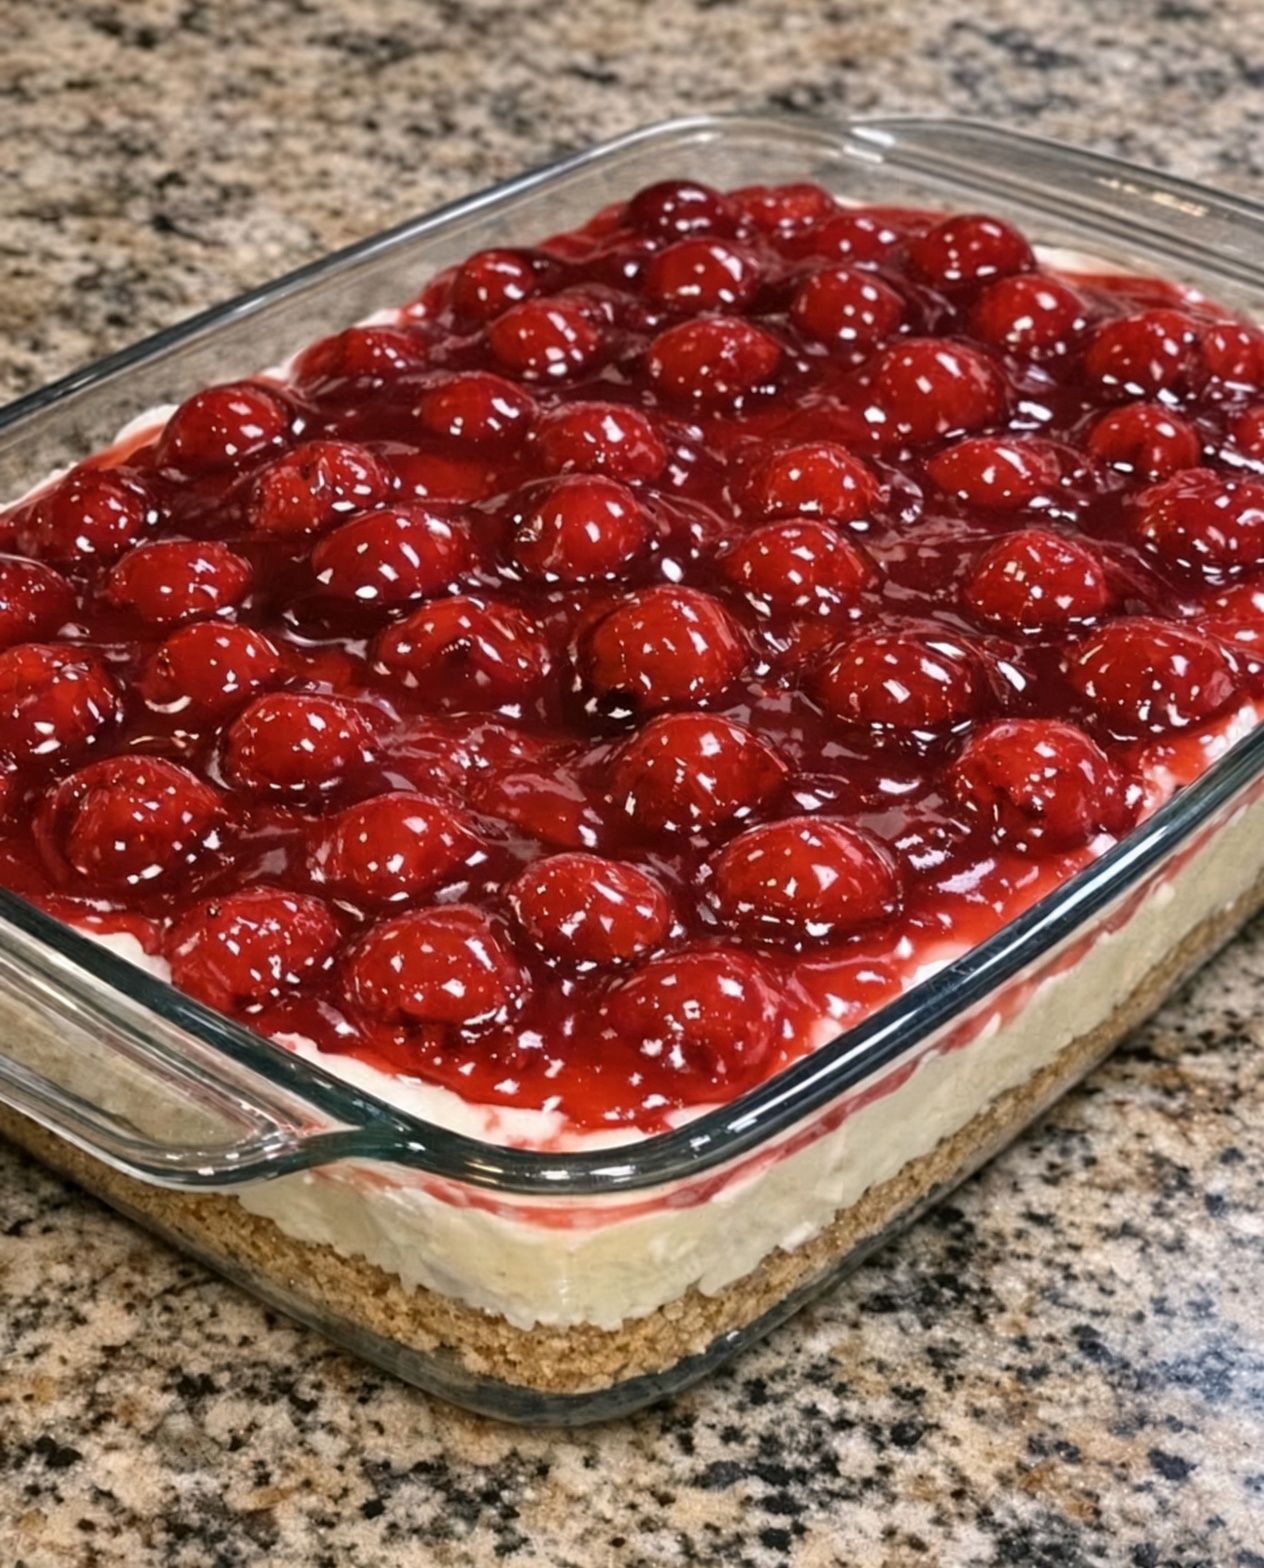
These 4-Ingredient Cherry Icebox Bars are a sweet, creamy, and refreshing no-bake dessert that makes homemade treats wonderfully simple. With a buttery cookie crust, luscious cherry filling, and a chilled texture that slices beautifully, these bars are perfect for potlucks, summer gatherings, holiday dessert tables, and everyday family treats.
The best part is how little effort they require. Four simple ingredients come together in layers, and the refrigerator does most of the work. The cherries add a bright fruity flavor, while the creamy filling creates a smooth contrast against the crisp crust.
Whether you need a last-minute dessert or an easy make-ahead treat, these Cherry Icebox Bars are a delicious recipe to keep on hand.
Why You’ll Love These Cherry Icebox Bars
- Only four ingredients: A short shopping list makes preparation easy.
- No oven required: Ideal for warm days when you want to avoid baking.
- Sweet cherry flavor: Cherry pie filling delivers fruity flavor and a beautiful color.
- Make-ahead friendly: Chill the bars before serving for convenient entertaining.
- Easy to share: Slice into squares for parties, potlucks, and family gatherings.
Ingredients
- 2 cups graham cracker crumbs: Create the base for the bars.
- ½ cup unsalted butter, melted: Binds the crumbs into a firm, buttery crust.
- 8 ounces cream cheese, softened: Adds a rich, tangy creaminess to the filling.
- 1 can (21 ounces) cherry pie filling: Provides the sweet cherry layer and vibrant color.
These four ingredients create a simple layered dessert. The cream cheese layer is intentionally left lightly sweetened by the cherry topping; if you prefer a sweeter cheesecake-style filling, you can add powdered sugar, but that would make it a five-ingredient variation.
How to Make 4-Ingredient Cherry Icebox Bars
Step 1: Prepare the Pan
Line an 8-by-8-inch square baking pan with parchment paper, leaving some overhang on two sides. This makes it easier to lift the chilled bars out for slicing.
Step 2: Make the Crust
Place the graham cracker crumbs in a medium bowl and pour in the melted butter. Stir until the crumbs are evenly moistened and resemble damp sand.
Transfer the mixture to the prepared pan. Press it firmly into an even layer using the back of a spoon or the bottom of a measuring cup.
Step 3: Prepare the Cream Cheese Layer
Place the softened cream cheese in a mixing bowl. Beat with an electric mixer until smooth and creamy, scraping down the sides of the bowl as needed.
Spread the cream cheese evenly over the graham cracker crust. Work gently so the crust stays in place.
Step 4: Add the Cherry Topping
Spoon the cherry pie filling over the cream cheese layer. Spread it carefully with a spatula, distributing the cherries and filling evenly from edge to edge.
Step 5: Chill Until Firm
Cover the pan and refrigerate for at least 4 hours, preferably overnight. This allows the crust to firm up and the layers to become easier to cut.
Step 6: Slice and Serve
Use the parchment overhang to lift the dessert from the pan. Cut into squares with a sharp knife, wiping the blade between cuts for cleaner edges.
Serve cold and return any remaining bars to the refrigerator promptly.
Tips for the Best Cherry Icebox Bars
Soften the cream cheese first. Room-temperature cream cheese spreads more easily and helps prevent lumps.
Press the crust firmly. A compact crust is less likely to crumble when the bars are sliced.
Spread the layers gently. Take your time when adding the cream cheese and cherry filling so the layers remain distinct.
Allow enough chilling time. Four hours is a good minimum, but overnight chilling usually gives the bars a firmer texture.
Use parchment paper. It makes removing and slicing the dessert much easier.
Easy Variations
Cherry Cheesecake Icebox Bars
For a sweeter, richer filling, beat ½ cup powdered sugar into the cream cheese before spreading it over the crust. This adds a fifth ingredient but gives the bars a more traditional cheesecake flavor.
Chocolate Cherry Bars
Use chocolate cookie crumbs instead of graham cracker crumbs for a chocolate-and-cherry combination.
Blueberry Icebox Bars
Replace the cherry pie filling with blueberry pie filling for a different fruity variation.
Strawberry Icebox Bars
Use strawberry pie filling for a bright, summery version with a sweet berry flavor.
Almond Cherry Bars
Add a small amount of almond extract to the cream cheese layer for a classic cherry-almond flavor. This is an optional additional ingredient.
What to Serve with Cherry Icebox Bars
These chilled bars are delicious on their own, but they also pair well with:
- Fresh cherries or berries
- A cup of coffee or tea
- Vanilla ice cream
- A glass of cold milk
- A light fruit salad
For a pretty dessert platter, arrange the bars on a serving plate and garnish with a few fresh cherries just before serving.
How to Store Cherry Icebox Bars
Store the bars in an airtight container in the refrigerator for up to 4 days. Keep them chilled until ready to serve because the cream cheese layer softens at room temperature.
To freeze, arrange the bars in a freezer-safe container with parchment paper between layers. Freeze for up to 2 months for best quality. Thaw in the refrigerator before serving; the crust may soften slightly after thawing.
Do not leave the bars at room temperature for more than 2 hours, or more than 1 hour when the temperature is above 90°F (32°C).
Frequently Asked Questions
Do I need to bake the crust?
No. The melted butter binds the graham cracker crumbs, and refrigeration helps the crust firm up. Pressing the mixture firmly into the pan is especially important for a no-bake crust.
Can I use fresh cherries instead of pie filling?
You can, but fresh cherries need to be pitted and cooked with a sweetener and thickener to create a topping with a consistency similar to pie filling. The four-ingredient version is simplest with ready-made cherry pie filling.
Why are my bars difficult to slice?
They may need more chilling time, or the cream cheese may have been too soft when the bars were assembled. Refrigerate until firm and use a sharp knife, wiping it clean between cuts.
Can I make these bars the night before?
Yes. Overnight chilling is ideal and makes the bars easier to cut and serve the next day.
Can I make these bars sweeter?
Yes. Beat powdered sugar into the cream cheese before spreading it over the crust. Keep in mind that this adds another ingredient to the recipe.
4-Ingredient Cherry Icebox Bars Recipe Card
Prep Time: 20 minutes
Chill Time: At least 4 hours
Total Time: About 4 hours 20 minutes
Yield: 9–12 bars
Ingredients
- 2 cups graham cracker crumbs
- ½ cup unsalted butter, melted
- 8 ounces cream cheese, softened
- 1 can (21 ounces) cherry pie filling
Instructions
- Line an 8-by-8-inch square pan with parchment paper.
- Mix the graham cracker crumbs and melted butter until evenly combined.
- Press the crumb mixture firmly into the bottom of the pan.
- Beat the softened cream cheese until smooth.
- Spread the cream cheese evenly over the crust.
- Spoon the cherry pie filling over the cream cheese layer.
- Cover and refrigerate for at least 4 hours or overnight.
- Lift the chilled dessert from the pan, slice into bars, and serve cold.
Recipe Notes: This is a simple, lightly sweetened version. For a sweeter cheesecake-style layer, mix powdered sugar into the cream cheese before assembling.
Final Thoughts
These 4-Ingredient Cherry Icebox Bars are a simple way to create a cool, fruity dessert without turning on the oven. The buttery graham cracker crust, creamy layer, and sweet cherry topping make each square a satisfying treat.
Prepare them ahead, let the refrigerator do the work, and slice them when you’re ready to serve. With just four ingredients and minimal preparation, these bars are a convenient addition to your collection of easy homemade desserts.